Tuesday, 2 June 2015

My Supertote

Ta-dah. Introducing the first real bag I've ever made!!!! :D


Supertote pattern by Anna of Noodlehead.

It's the first time I try one of Anna's patterns, and I'm super pleased with the final product. Anna's instruction are straightforward and clear! Here are some notes that came to mind while making this bag:

1. My least favorite part of sewing - preparing the fabric, cutting the pieces. This pattern has a lot of pieces. Over the course of a week or so, I cut and prepared my fabric pieces. Then the nice little bundles stayed on my sewing table for a few days while I recovered from that! hahaha!

2. The little squares on the exterior pocket are what spurred me to make this Supertote in the first place. Having ordered some beautiful fabric from Alison Glass (Petal in Eggplant from the Handcrafted range; planning to make a summer dress with that), there were a few samples of her Sun Print line in the package when it arrived. Ooh, I had to make something that would show off these colorful squares.

3. I decided to use an old pair of jeans to create a reinforced gusset layer. Needless to say, when I was sewing the lining to the bag exterior, throught the pleat region, there were about 8 layers of material there. So as not to damage my machine and needle, I slowing (and manually) passed the needle through the fabric. I see now, after a few weeks of use, that the stitches are sort of loosening, so I may have to hand-stitch those spots closed. Maybe. This kind of hand sewing is not my favorite thing! ;)


4. The interior pockets are indeed roomy as Anna describes in the pattern. However, I think I made mine a tad too roomy. Probably because I didn't tighten the elastic enough. The pockets gape open a bit, so they function more as dividers than pockets. At some point I may un-stitch the lining and try to tighten the elastics, but perhaps I'll just leave them as they are at the moment.

5. I used a thrifted and dyed bed sheet as the fabric for the lining. I should have realized that a used bed sheet will have thinner regions in the fabric where head and/or feet will have worn away the thread. Thus, the main compartment of my inner lining bag is a bit thread-bare, it may need replacement at an earlier timepoint than expected. ah well.

6. I always keep (tiny) left-over scraps from a project, thinking to myself, "one day this will come in handy". Well, making this Supertote, I was able to use up a tiny piece of yellow cotton containing orange flowers for the zipper tabs, and a half-yard cut of a yellow paisley cotton that I had bought years in a quilting shop just because I liked the yellowness of it ;) It's yellowness matched (almost) perfectly with the yellow of the inner lining, so yay to using up some of my scrap stash!


7. Altogether, this bag took a couple of evenings to construct. However, it was "in-the-making" for about 5-6 weeks! Ha! A few days after I finished making the bag, we went on holiday. So I brought it for it's maiden voyage, and it's definitely a great travel bag due to it's roomy-ness.

Right, on to the next project! (ignoring the growing pile of clothes that need mending....)


Friday, 3 April 2015

Sending hugs in the post :: part 2

For my mother, I took an old wool sweater of mine, one she knew well from the time I still lived at home, and cut out a large love-heart. Onto this I hand-sewed some felt flowers (continuing my felt obsession), and machine-appliquéd a smaller love-heart onto the front, made with a scrap of woolly sweater and some fabric (from a thrift-store shirt, the same one I used to make a mini doll shirt out of).


The same thrift-store shirt served as the backing for creating a....cushion. I stuffed it full of polyfill, cuddled it for a few evenings, and then shipped it off to the green isle.


Edit to add ::

Unfortunately the postal company that was in charge of delivering the package within Ireland is a complete joke; I used Track-and-Trace, and although online it stated that delivery had been attempted several times, there was no trace of it being anywhere near my mother's home.

At least the package made it's way safely back to me...I will have to give this heart to my mother in person. An excellent reason for a visit, don't you think? ;)


Friday, 20 March 2015

Sending hugs in the post :: part 1

I don't live in the same country as my mother or my sister. We are spread around Europe, just a few hours away by aeroplane. We can visit the lush greenery of Ireland to see my mother, and we can bask in the hot sunshine when visiting my sister in the south of Spain. They come here (the Netherlands) to marvel at the intricate grid systems of canals and windmills that keep the fields and cities safe from flooding.

The modern world allows us to keep in touch via Skype and What's App etc, but it doesn't replace the comfort of a hug. A real, in-person, hug. Nothing ever will.

But some things can come close. Let me show you what I made as substitutes for hugs for when we are not around each other in person.

For my sister, I made a doll, using the pattern from this wonderful book, De Poppen van Tante Hilde. I love that this book gives you the basics (doll and clothing) and then the sky is the limit. This is my second time making a doll like this (the first one lives in Germany now), and I love the results.

Using an old t-shirt of mine as the body, which I dyed slightly with coffee to darken it from white-beige to a bit of a darker beige, and some interesting gold/green/beige cotton for her torso (I didn't have enough t-shirt material left due to a cutting error! Oops!), this little woman came to life.


I decided to give her a felt hair style, which I machine stitched with a decorative flower-like stitch. I ended up not including the bear ears as depicted in the middle image above...


I upcycled a thrift-store shirt to create a mini-version for the doll (again, using the pattern for the open blouse from Tante Hilde's book). I managed to keep the original buttons, so from cutting to finished product, this little item of clothing was made in a jiffy! For her skirt, I used some left over corduroy originating from an old pair of my husband's trousers. Mini-man and Big Brother contributed to the doll by drooling on, or playing with her before I wrapped her up for posting.


I added a box of different tea-bags for my sister's partner, and sent the whole thing...by snail mail (a self-carved stamp, inspired by this lovely book by Gennine; and she has a great online resource if you want to try it out yourself).


And I can happily say that she was well received by the recipient :) Yay! Now there's a little bit of the four of us keeping my sister company even though we are far from each other.


Tuesday, 3 March 2015

Two Milos

I've had Georgie Hallam's Milo pattern in my Ravelry library for a long time. At the end of October last year, I finally cast on to knit one. Here are my Ravelry notes with yarn details. I decided to make an 18month size, for my (then) 7 month old. Ha. My idea was that if this project was put on the shelf (as many of my knitting projects do) then perhaps it would be at least finished by my son's 2nd winter (i.e 2015/2016!).


I took it to work with me, and while I pumped, I knitted. It was a nice way to spend those pumping sessions, instead of being stuck on my smart phone! This strategy worked as I finished this Milo vest in record time: about a month!!!!! One thing struck me...the vest looked huge. I  guess my tension was a bit looser than my swatch tension.


 I tried it on the mini-man, and as expected, it was way too big. Although he has worn it a few times, so its not that huge on him. By eye, it looked like it might fit the big brother, so I asked him if he wanted to try it on, and after a little hesitation he agreed. It fit him perfectly, but at the time, he wasn't too keen on the vest. I quote "It is nice mama, but I don't want to wear it" when I suggested that he could have this vest. Hmmm.

It was such a quick (and satisfying) knit, that I casted on another, this time in the 12month size (for the now 10month old). (ravelry notes). It took me a little longer to finish the second one, partly because I had cast-on another project at the same time (the Hitch-hiker shawl), but I finally cast off around the middle of February.


I tried the new one the mini-man, and its lovely :) The fit is perfect.


And in reaction to seeing his little brother all decked out in his own milo, the big brother asked me one morning "Mama, where is the vest you made me ....I want to wear it!" However, I have yet to document him wearing it; he never sits still long enough to get a picture. But I did manage to get proof of mini-man wearing these mama-made knits :) Aw!


Sunday, 1 March 2015

The tale of two pouches

I made these zippered pouches as gifts.

The first one was gifted to my son's daycare teacher who was leaving for another job. He had gotten on really well with her, and she was great at her job. We were sad to see her go. Luckily, her successor is just as awesome as she was! 


The second pouch I made was a birthday gift for a dear friend of mine. I don't get to see her often anymore now that we no longer live in the same country, but this year we paid her and her family a visit to celebrate her day. It was great to be able to give this to her in person.


The outer part of both pouches is made with a thick layer of felt, onto which I machine appliqued some (very simple) felt flowers. I played around with the arrangement beforehand, and I secured them down with a small bit of glue before sewing them on. I lined each pouch with some quilting cotton from my stash.


Nice and quick, and very satisfying to make. I think I should make myself some too. You can never have too many pouches. Hahaha! 


Monday, 18 August 2014

Rawr...

Another birthday rolled around, this time a birthday boy from a few doors down. He's the same age as our mister man and they enjoy each other's company when they're not claiming each other's toy as "mine"!!!! Seeing how 3 year olds can solve disagreements sometimes shocks me (e.g.when shoving is involved) but on the other hand can surprise me with how compassionate each can be to the other.

He's a Dino fan (like our son) and I did think of making a similar t-shirt with a felt Dino appliquéd to the front. But, after a few washes, Dino had shrunk a little (re-felted?) so now the t-shirt is a bit scrunched up in the middle. I guess it's not ideal for clothing that needs to be washed often. Lesson learnt!

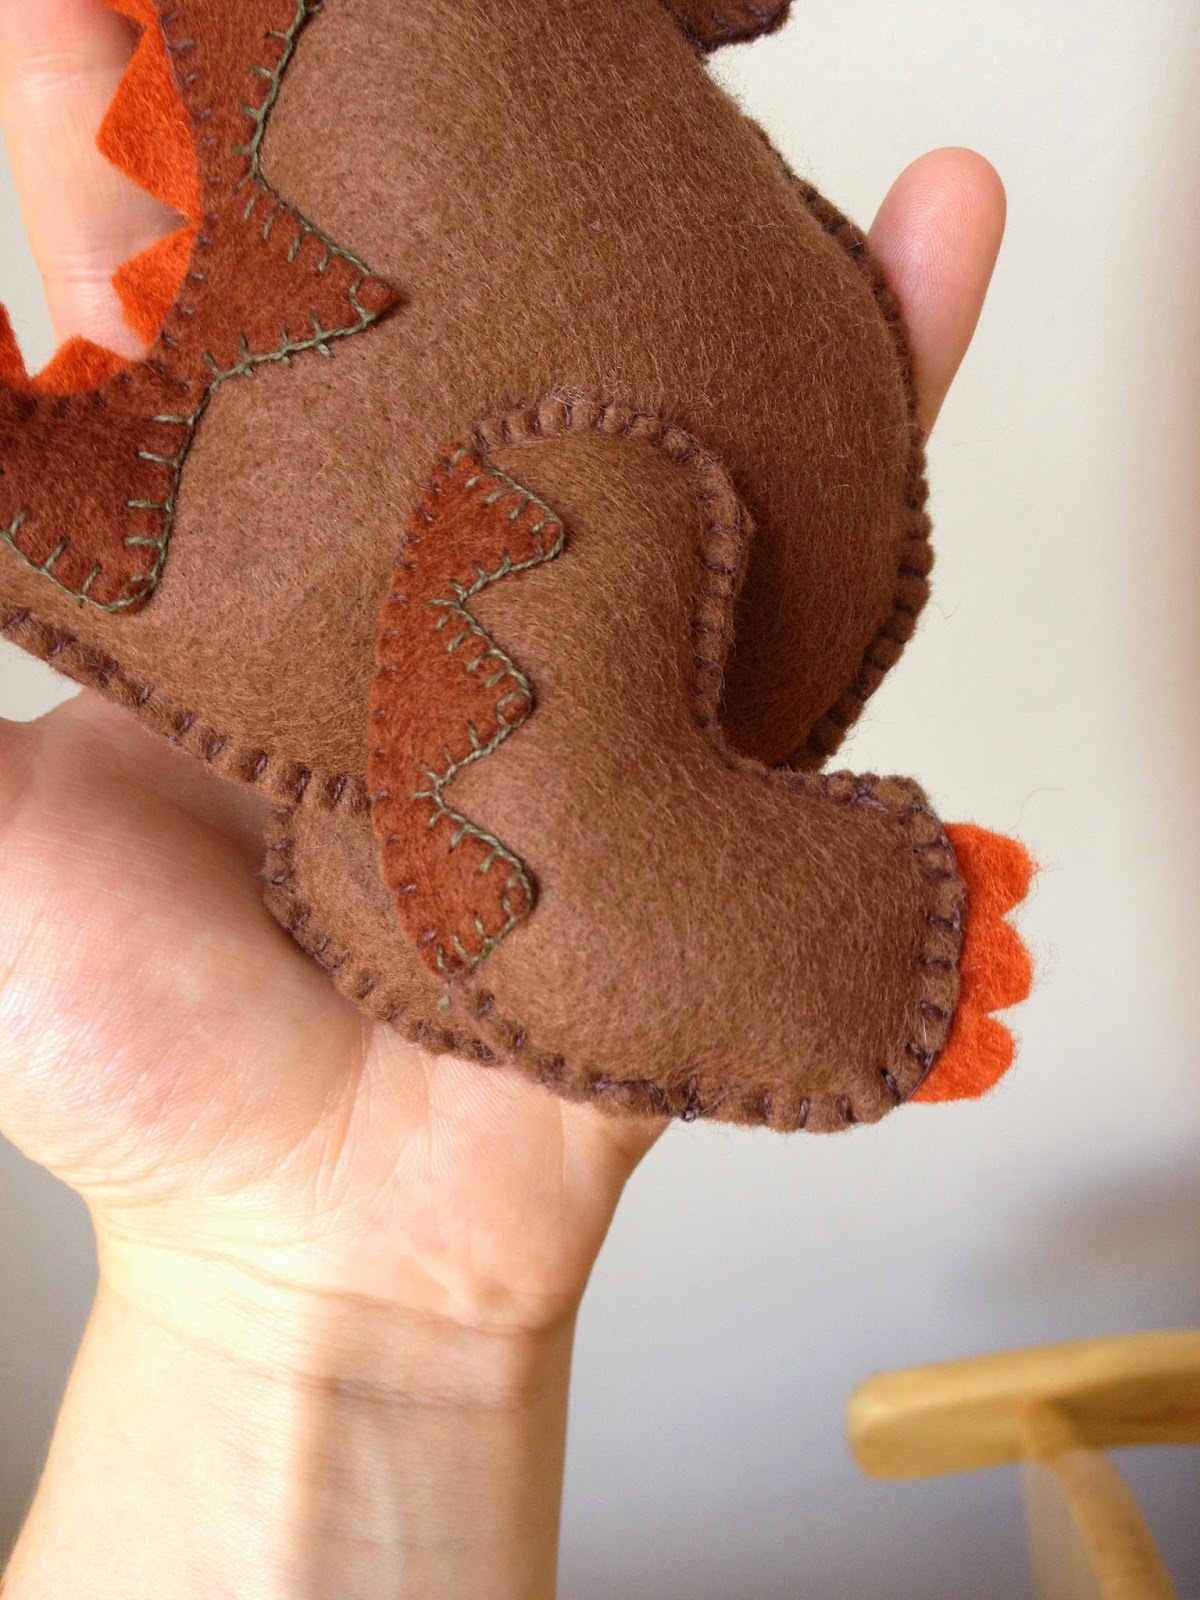
Instead I decided to make a Dino softie! I drew out a pattern on paper, cut the pieces out from felt, and starting sewing. A few stitches here, a few there. It's nice to have a quick and easy project within hands reach. I glued the decorative parts to the main body before blanket stitching them on so that they stayed fixed as I sewed them. I stuffed him with some polyfil until he was nice and squidgy!


And after a few evenings...Mr Dino was ready. And I was told that the Birthday Boy did not let go of his new Dino softie until he was fast asleep that night. It's always nice to hear that your handmade items are well-appreciated, isn't it? :)


Tah-dah!!!


Upon returning home, my almost-3-year old put in a request for a Dino of his own. Seeing as his birthday is just around the corner, I'm now busy stitching another T-Rex. The pieces are cut...and now for some hand-sewing...


Monday, 7 July 2014

Dinosaurrrrr

Mister Man really likes his Monster t-shirt, much to my delight! I've made shirts for him before but this is the first time he actively searches in his wardrobe to wear this mama-made tee. No need to convince me to make another tee for him. Again, I used the FST pattern from Rae (cut out size 5T, with 4T length). Found some Pinspiration here and hand-appliqued a felt-dinosaur to the front of the tee. And this was a collaborative project, as even Papa joined in; he cut out the dino and his spikes.

Using a blanket stitch and embroidery thread, I attached the dino to the t-shirt (I used a small bit of washable pritt-stick to keep the dino in place while I stitched). It has been a while since I hand-stitched something, and the slow repeatable motions were quite relaxing.


And much to my delight, this tee has also been approved by the little man, who is such a busy little bee, it was hard to get a "non-blurred" photo of him wearing his newly acquired tee-shirt.


I was worried the felt wouldn't hold up being washed (for the first time) in the washing machine, but I just turned the t-shirt inside out and put it in a lingerie wash-bag so it wouldn't be rubbed against during the wash cycle and it came out fine.

Friday, 27 June 2014

Something girly

I've had this Lillestof organic cotton jersey in my stash for a while, never really knowing what to make with it. However, a day-care friend of my son is celebrating her 3rd birthday this weekend, so I decided to make her a little something.


This t-shirt is made using Rae's Flashback Skinny Tee pattern, cut out in size 3T. I really like this pattern, it's definitely becoming a staple go-to pattern for me. And it's easy to modify...I added 2.5cm to the front on order to create gathers along the front neck line but they're not that obvious. Ah well, perhaps my next attempt will turn out better! An old t-shirt of mine provided the fabric to create the cap sleeves and to bind the neck line. As you can see from the *beautiful* stitching along the neck-line, I have to improve my patience when sewing the final touches on a garment ;) I added a ribbon "label" so that it's easy for the little Miss to determine the back/front of the t-shirt.


To complete the gift, I wanted to make one extra thing, a little pouch or bag, but before starting I decided to check my IG feed, and noticed the lovely felt pouches my sister-in-law had just made and posted a tutorial for...what perfect timing. Thus, a little matching pouch was sewn, and hopefully the birthday girl will fill it with her treasures.


Tuesday, 3 June 2014

A belated birthday gift...

It was the birthday of a good friend of mine a few weeks ago, and I wanted to make her something to mark the occasion. We don't see each other very often, and months can go by between chats. However, I think about her often, and every now and then we exchange hand-written letters or a long phone call. It's the type of friendship isn't affected by silence or distance...we can pick up exactly where we left off.

She loves getting dolled up for nights out. I remember many a Saturday night getting ready at her place, chatting and giggling as we anticipated dancing the night away! She had (and probably still has) quite a collection of make-up, and I remember the "hundreds" of bottles of nail varnish in every colour imaginable. So what better than to make her a Snappy Manicure Wallet by Anna of Noodlehead (free tutorial here). I filled it with some new bottles of nail varnish, some new nail files and some hand creams. I wrapped it up in some happy polka-dot paper and posted it off. 

Happy belated birthday, dear friend! xxx


Friday, 23 May 2014

Cute Little Monsters...

Time took on a different meaning in the last months, but finally Mini Man made his appearance on the 22nd April.


To celebrate his arrival I made a birth-notice card to share with family and friends. A quick search on pinterest led to me to this pin, and the Cute Little Monster theme was born ;) I created 4 monsters out of felt (one for each member of the family), photographed each one on a white background and used Adobe Illustrator to prepare the images for the birth card. We printed our cards using an online service and we were really happy with the quality.


To celebrate the arrival of his little brother I made big brother a new T-shirt. Using Rae's Flashback Skinny Tee pattern, I made a 5T size with a 4T length (Mister Man is a stocky little fella for an almost 3 year old). I gave it short sleeves in time for summer. Using the pre-existing hems of the XXXXL shirt I used to make Mister Man's tee made this a super fast sew. I printed out the monster onto iron-on transfer paper, and added it to the shirt. 


And here it is being modelled by the new big brother...


Thursday, 30 January 2014

My Honey Cowl

I've seen many of these pop up throughout blog-land over the last year, and with each version I saw I wanted to make one for myself. Just look at these beautiful versions made by Amanda of Soulemama (purple, or brown colourways). And I just love the deep blue of Anna of Noodleheads version (in Thunderstorm colourway)

Yep, it's the The Madeline Tosh Honey Cowl! 

While visiting my not-so-local yarn store I bought their last skein of Rowan Colourscape Chunky in the Storm (#439) colourway. It's only 160m/100g, and as the Honey Cowl pattern asks for 206m, I also bought a skein of Lana Grossa Bingo in dark green (colour #124), which gives you about 80m/50g.

The pattern is simple enough to knit but not so straightforward that you get bored. Perfect combination to keep you busy while relaxing.

I cast on (160 stitches) back in early October and over the last months it's kept me company throughout car rides, airplane journeys and exploring Netflix ;)

I started with 2 rounds of Bingo, then switched to the Colourscape Chunky yarn. And I continued until that yarn ran out, switching back to Bingo for the last 10-12 rounds.

Finally, after 4 months on the needles (5mm, 80cm circular) it's finished, just in time for the first real days of frosty, icy mornings! The combination of lambswool and merino wool feels really nice against my face; I think I'm going to enjoy the crisp winter air with this snugly wrapped around my neck!


Friday, 24 January 2014

Another type of doll...

I promised myself that I would only start a new project, once I had finished one on my Work-in-Progress list. Well, my little man got his doll, after months of it sitting in my WIP box. So time to start a new project...

I bought this book for myself for Christmas. My sister-in-law had made a beautiful Princess doll for her daughter for Christmas, and so I wanted to give this style of doll-making a try. My experience with doll-making being limited, I found the instructions of Tante Hilde straightforward and clear. You should check out her blog and marvel over the amount of lovely dolls this woman has created...

With a clear deadline in mind (visiting friends whose daughter would be the recipient of the doll), I started tracing and cutting the fabric for this doll 5 days before we had to leave. Stuffing a doll isn't as boring when you're watching a hilarious comedian, so after two short evenings the doll was stuffed and ready to be given hair and a face. In one evening I had given her dark brown eyes, and a soft pink mouth. Her hair is two-toned, brown and cream, and gathered into two pigtails on either side of her head. She was given a batik-like torso, because I didn't have enough skin-coloured fabric for the entire doll ;)


I made her a plain khaki skirt, trimmed with orange-blossom bias tape. Now she was ready (or at least we had to leave to visit the friends whose daughter was getting this doll). Into the car she came with us as we travelled north, through Friesland and over the border into Germany, where she was well received by her new owner!

However an outfit isn't complete without a jacket and shoes, so upon my return I made her a little fleece cardigan, trimmed in the same bias as for the skirt, and completed the look with a pair of green felt shoes. 

And now there's a little package in its way to Germany. 

I've learnt that there's nothing like a clear deadline to get my creative bug rolling. Now, to instil that sense of deadline for other projects...

Sunday, 12 January 2014

A Waldorf doll


About a year ago I really wanted to make a Waldorf-inspired doll for my then 1-year old son. I liked the idea of creating a look-a-like doll for him, and while I don't necessarily find all aspects of Waldorf style education appealing, I like the idea of using simple, natural materials/toys for development through play.  I found a supplier of doll-making kits in the Netherlands and I ordered this kit, which, with the blond hair shown on the kit, is basically my son in waldorf-doll format. Perfect!

The kit arrived and I got started straight away. The limbs, head, and body were made and then sat in my "work-in-progress" box for nearly a year (oh, I am so ashamed to admit that!) as other aspects of life took over (I'm this close to finishing my PhD thesis!). 

Well, my little Mister Man is still waiting for that doll! And given my crafting resolutions for this year it was first on the list to become a Finishing Object!


Then he got a cap of hair:


Using a crochet hook, I added locks of hair all over the cap, followed by a "stylish" hair cut. 
And he really came to life with the addition of two blue eyes, a little button nose, and a cheeky red grin.

Then, with the help of this book, I made a lumberjack type hoody (with Velcro along the front) and a pair of pleat-front trousers to dress this new boy. 


I'm so happy how he turned out. Here he is, enjoying the bit of sun we got in this cold winters day. Now to introduce him to my little man. 

Here's to the first item crossed off my In-Progress list! Yay!

Elizabeth